Installing 3Scribe’s Zendesk Integration
Overview
The 3Scribe Zendesk integration allows you to automatically transcribe audio attachments and voice notes from tickets. Setup takes only a few minutes. This guide will walk you through the 3Scribe Zendesk integration installation process, including connecting your account and confirming the app is ready to use. Once installed, you can also configure which events trigger automatic transcriptions (such as voicemail, inbound calls, or outbound calls) and use the app to request transcripts manually.
Before You Start
Before starting the 3Scribe Zendesk integration installation, ensure you have the following:
- A Zendesk Support or Suite account
- Administrator permissions in Zendesk
- An active 3Scribe account
Step 1 – Find the 3Scribe App in the Zendesk Marketplace
You can install the app directly from the Zendesk Marketplace.
- From your Zendesk dashboard, go to Admin → Apps and Integrations → Zendesk Support Apps.
- Click Marketplace and search for 3Scribe Transcriptions.
- Alternatively, you can go directly to the 3Scribe Transcriptions Marketplace listing and click Install.
Step 2 – Connect Zendesk to 3Scribe (OAuth Authorization)
After selecting Install, the integration installation screen opens.
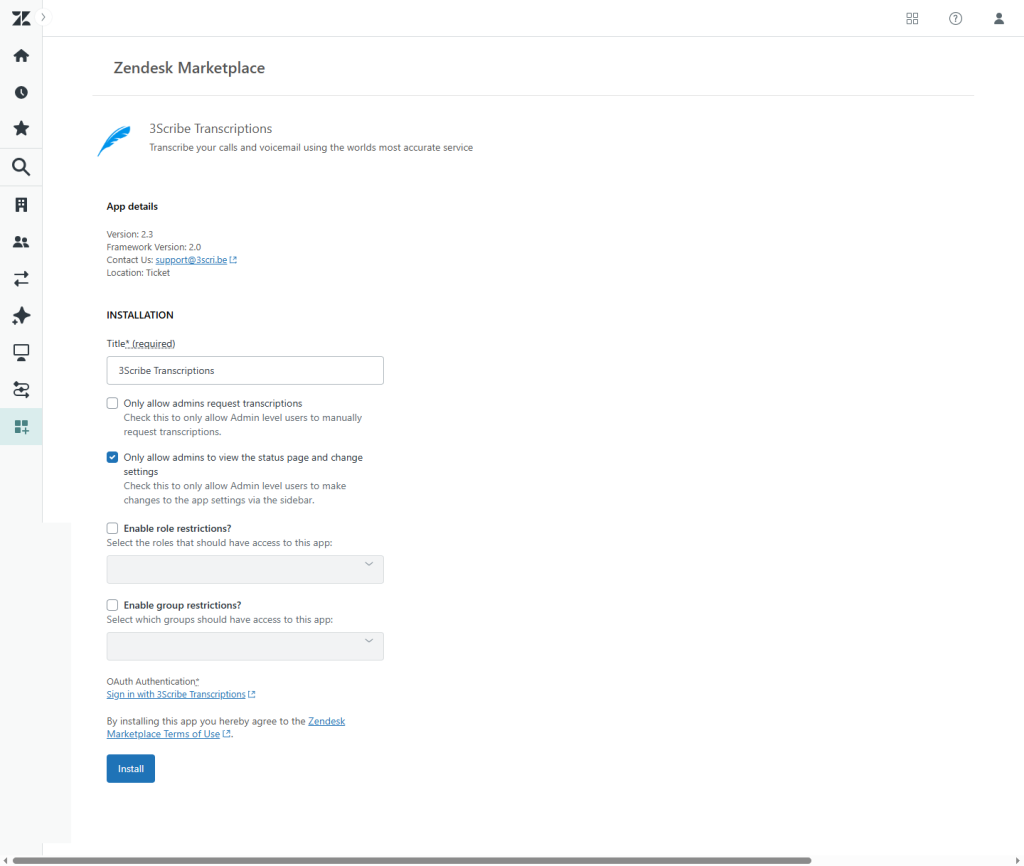
- Under OAuth Authorization, click Sign in with 3Scribe Transcriptions.
- A new browser window opens, showing the 3Scribe authorization page.
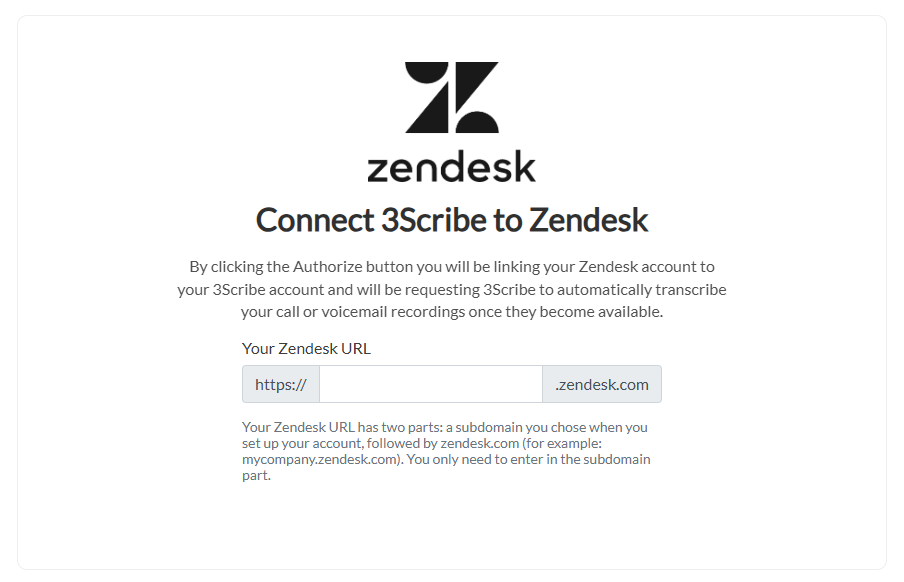
- Enter your Zendesk subdomain in the box provided (for example,
mycompanyif your Zendesk URL ismycompany.zendesk.com). - Click Authorize to start the connection process.
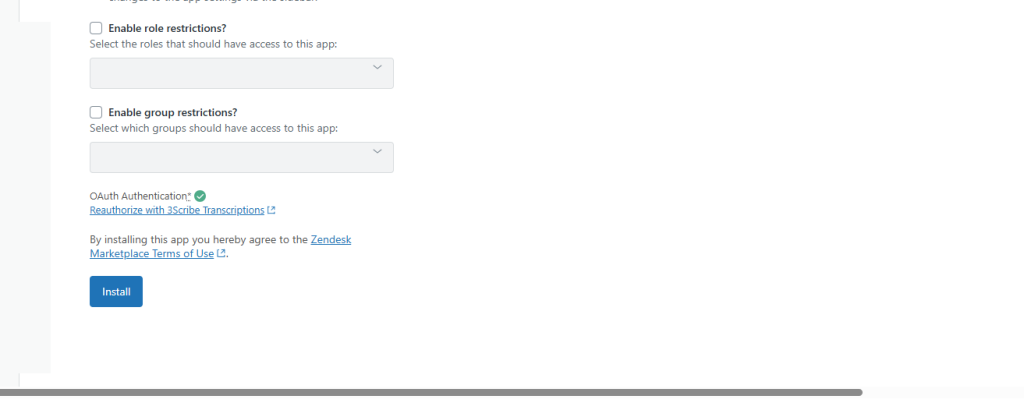
Authorizing takes a few moments. Once complete:
- The authorization window closes automatically.
- The install screen now shows Reauthorize with 3Scribe Transcriptions.
- A green tick appears beside OAuth Authorization, confirming your accounts are connected.
Step 3 – Finalize the Installation
Once the accounts are connected:
- Click Install at the bottom of the installation screen.
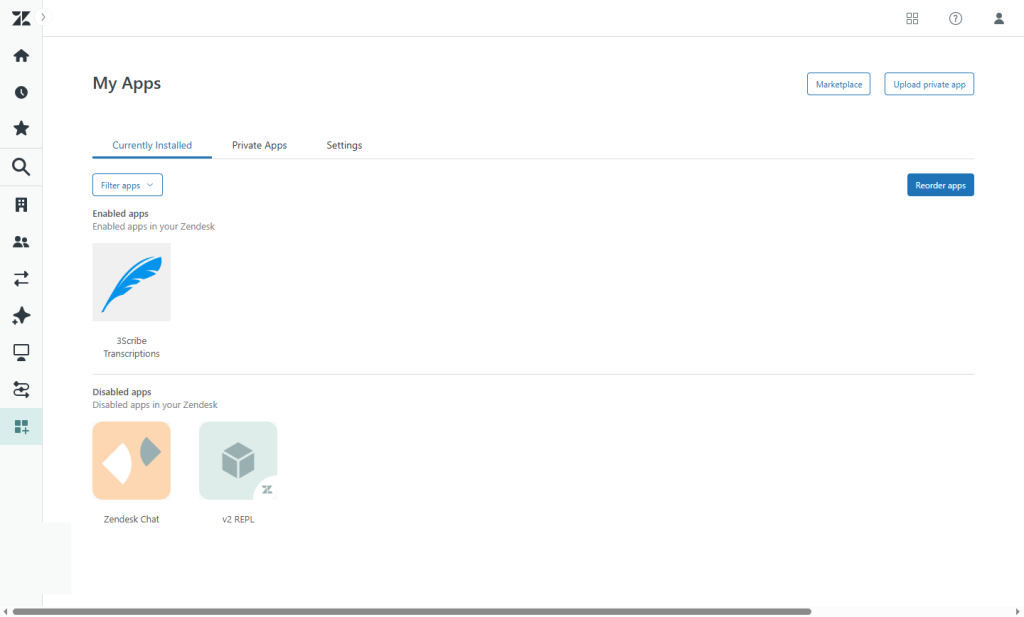
- Zendesk will finish the setup.
- The 3Scribe app now appears in the list of your installed Support apps.
Confirming the Integration
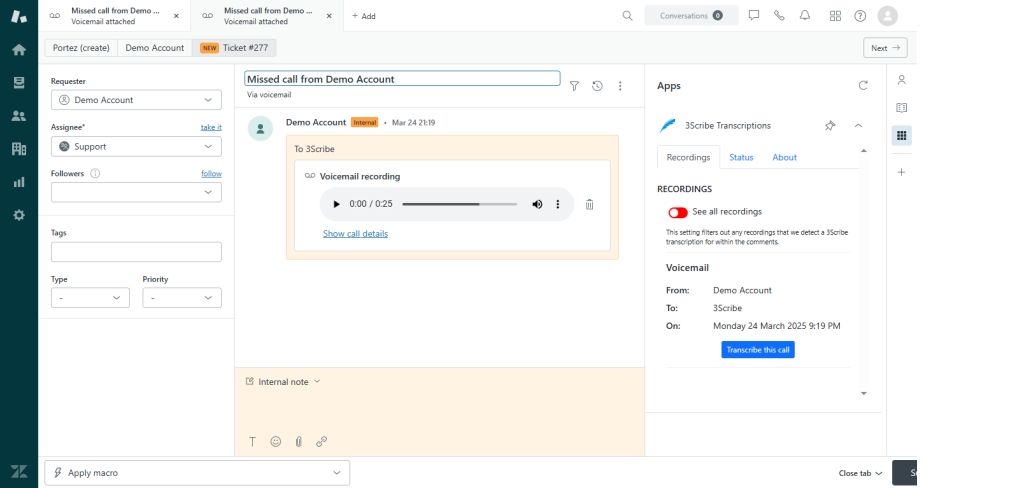
To confirm everything is working after the 3Scribe Zendesk integration installation, open any ticket in Zendesk. In the app sidebar you will see the 3Scribe Transcriptions app available.
Configuration of settings and manual transcript requests are covered in separate articles.
Troubleshooting Installation
If you run into issues during installation:
- Authorization failed: Ensure you only enter your Zendesk subdomain (e.g.,
mycompany), not the full.zendesk.comaddress. - App not visible in the sidebar: Confirm you have the correct role permissions in Zendesk, then refresh your browser.
- If issues persist, contact us at support@3scri.be.
Next Steps
After completing the 3Scribe Zendesk integration installation, continue with: