Manually connecting to 3Scribe in Zendesk
If you don't want to install our integration then you can manually connect your Zendesk account to 3Scribe. It's straight-forward and requires just 3 steps; 2 in your Zendesk Admin account and one in your 3Scribe account. You’ll need your 3Scribe API key which can be found here. The steps are as follows and you can do either the Zendesk or the 3Scribe ones first:
- Zendesk
- Create an extension target to 3Scribe.
- Create triggers to send voicemail or call recordings to the target.
- 3Scribe
- Connect 3Scribe to your Zendesk sub-domain using 0Auth. This allows us to return transcripts as a comment to the ticket that received the call.
3Scribe
This single step connects your 3Scribe account to your Zendesk domain using OAuth. Only transcription requests that are received from Zendesk are returned through this method.
- Navigate to this address: https://3scri.be/integrations/register/zendesk. You��’ll be prompted to log in to your 3Scribe account if not already logged in.
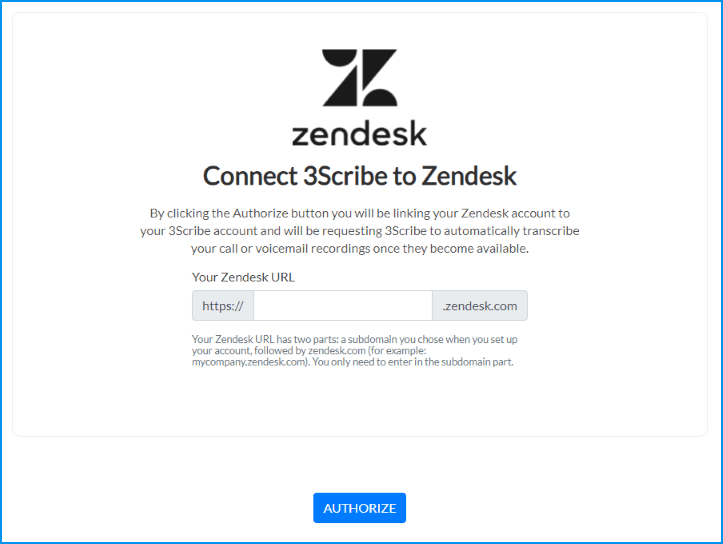
- On this page you’ll be asked to enter in the Zendesk domain you wish to connect. Once done, press the Authorize button. You will then be redirected to Zendesk to confirm that you wish to allow 3Scribe permissions to retrieve the recording URL and to deliver the transcript. Once confirmed you’ll get redirected back to 3Scribe to finalize the connection.
Zendesk
These steps are a little bit more manual but quite straightforward. You will need an Admin level account to be able to complete them.
Creating the target
In the Admin section of the menu, select the Extensions option in the Settings group. If you have any set up, you'll see a list of external systems that Zendesk sends notifications and data to on your behalf.
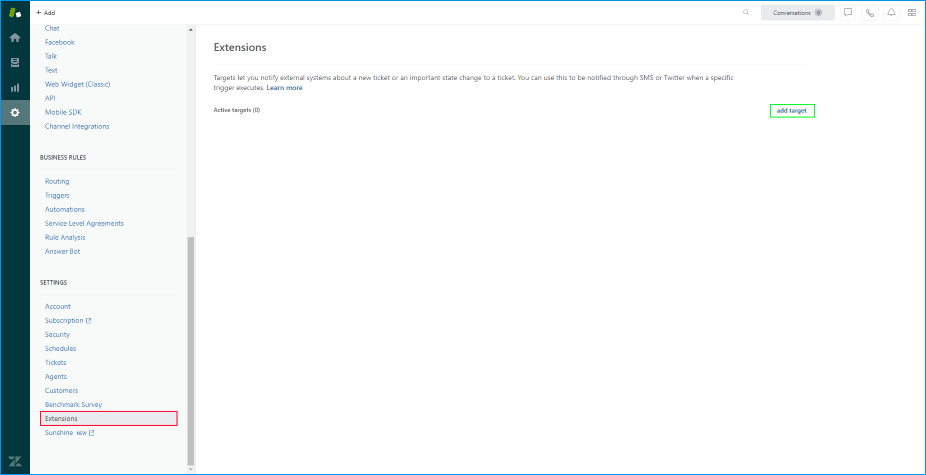
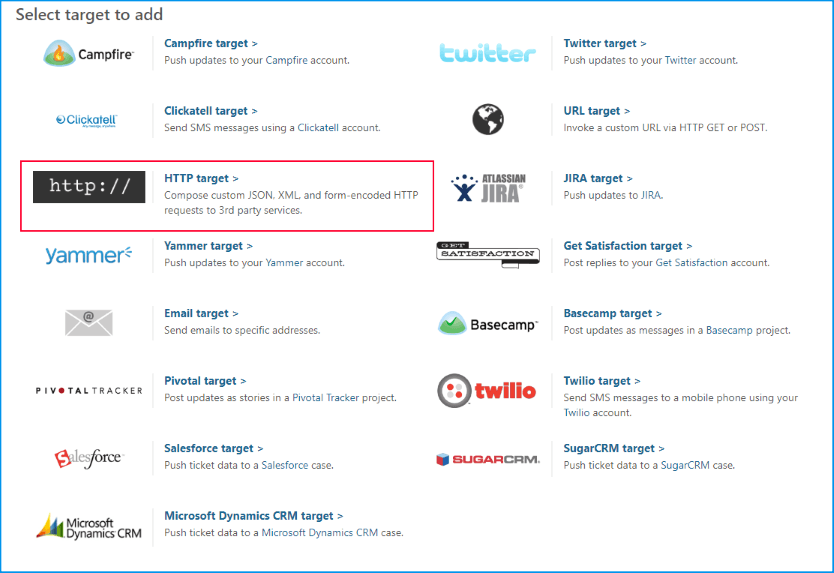
To add 3Scribe as a target, click the ‘add target’ option and then click ‘HTTP Target’ from the list of targets to add.
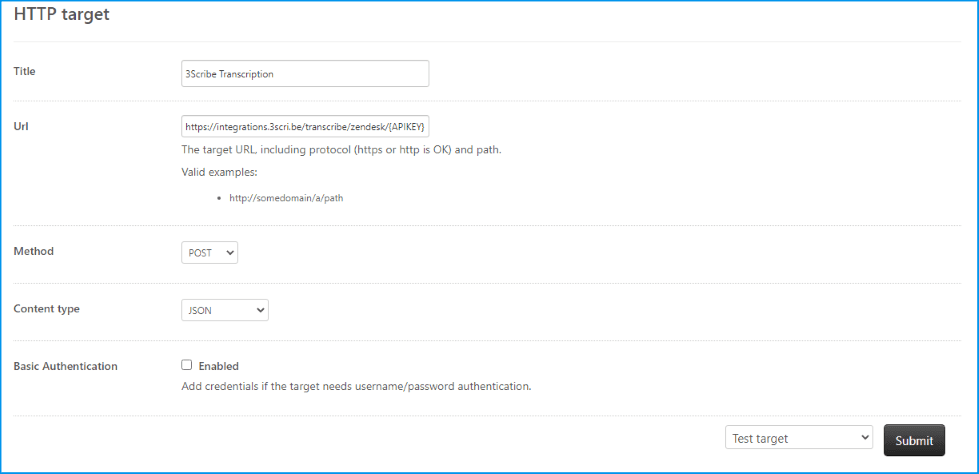
In the HTTP Target settings, enter in:
-
A descriptive title e.g. 3Scribe Connection
-
This address in the URL field: https://integrations.3scri.be/transcribe/zendesk/{APIKEY}
You will need to replace {APIKEY} with the actual API key from your 3Scribe account. Our Zendesk integration uses OAuth as an authentication method but the API Key is also accepted.
-
Change the Method to POST. A new dropdown will appear called Content Type which will default to JSON which is the format you'll be sending to 3Scribe.
-
Leave the Basic Authentication unchecked as the API Key acts as the authentication. That should leave you with a screen like this:
Beside the_Submit button is a dropdown defaulted to Test Target. Change the dropdown to Create Target and click on Submit. Once submitted you’ll be returned to the list of Targets created and you should see 3Scribe listed like this:

Creating the triggers
Triggers are actions that Zendesk takes when certain conditions are met. For 3Scribe you’ll be setting up triggers that fire when a voicemail is received or when an inbound or outbound call is placed. Zendesk actually has two sets of events for voice calls; one set is when the call goes through the telephony lines they provide or if it goes through an external telephony system (marked with the letters ‘CTI’). This gives 6 events that you can use to trigger a transcription request:
- Voicemail
- Phone call (incoming)
- Phone call (outgoing)
- CTI Voicemail
- CTI Phone call (incoming)
- CTI Phone call (outgoing)
You can either set up a single trigger to cover which of the 6 events you want or individual triggers, one per event. Individual triggers are useful for switching the events on and off but the single trigger groups everything together. Zendesk’s new Trigger Categories feature also allows you to group triggers together which makes management easier so we’ll be showing the individual method. If you want to take the single trigger route just remember to put the events in the Any section rather than the All section.
- Using the Dropdown button (it defaults to Add Trigger), select Add Category. You will then be prompted to enter in a name for your new category e.g. 3Scribe Triggers. Click Add to create the category.
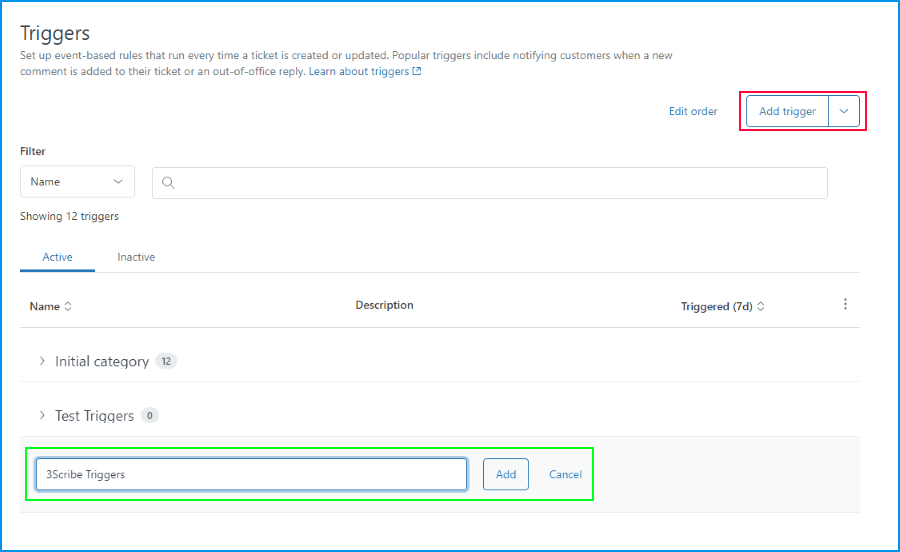
-
Once created, you’ll see your new category listed with an ‘+ Add trigger’ link beneath it. Click this to open the add trigger screen.
-
Enter in a descriptive title e.g. Transcribe a Voicemail
-
You can also optionally add a more detailed description.
-
In the Category dropdown list, make sure your new category has been selected.
-
N.B. When adding the condition, make sure you add the event in to the ALL section. If you’re creating a single trigger to handle all of the events you want then make sure to use the ANY section. The events contradict each other so putting them into the ALL section means the event will never be able to fire.
-
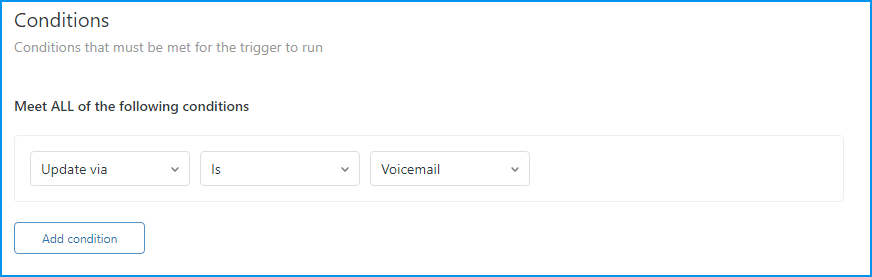
Click on the Add Condition button. This will create a new drop down list from which you need to select the Update via option. When you make a selection you’re instantly moved to the next dropdown that is created. In our case it’ll be a choice between Is and Is Not with Is being the one to select.
-
The final dropdown contains a long list of where updates to a ticket can come from. You’ll need to select the source you want to use i.e. Voicemail, Phone call (outgoing) etc.
-
You should end up with a line like this:
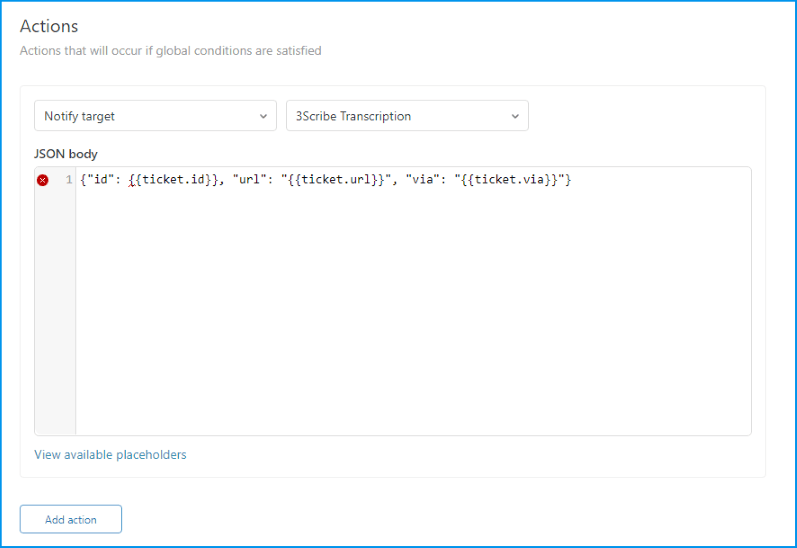
- When done, click on the Add action button to define what information is sent to 3Scribe. Again a dropdown will appear, from which you should select the Notify target option.
- This then creates a list of your targets from which you should select the new target you created earlier.
- Beneath those two dropdowns there will be a box called JSON Body. JSON is a text based format used for passing information between web systems and we’ll be using it to send the Ticket ID, the Ticket URL and how the ticket was updated to 3Scribe. 3Scribe uses this information to get the appropriate comment that contains the recording URL which we use to transcribe. Cut and Paste the following text into the JSON body field:
{"id": {{ticket.id}}, "url": "{{ticket.url}}", "via": "{{ticket.via}}"}
- You should now have an Action section that looks like this.
- Regardless of which event you want to use as the trigger, the action section does not change. When all is correct, click on the Create button.
- You should now be brought back to your list of Triggers where you can repeat the create trigger process for each of the events you require.

And that’s it. You’re all set up and you should now start seeing transcripts appearing in your tickets within a few minutes of a call ending.